Managing Google Drive File Access
How to share Google Drive files and add, remove, or limit access to an individual or group
Table of Contents
Audience: All Staff
System Preference: Windows laptops, Chromebooks, tablets, and smartphones
Through Google Drive, BCSC gives staff and students the ability to create, share, and collaborate simultaneously on Google Docs, Sheets, Slides, Forms, and more. The article below details how to share files created using these tools and any other content uploaded to your Google Drive with other users.
Step 1: Choose what file(s) to share
Sharing multiple files
Hold the "Shift" or "Ctrl" key on your keyboard and left click each file you want to share. The files you select will show a grey outline around them like in the image below.
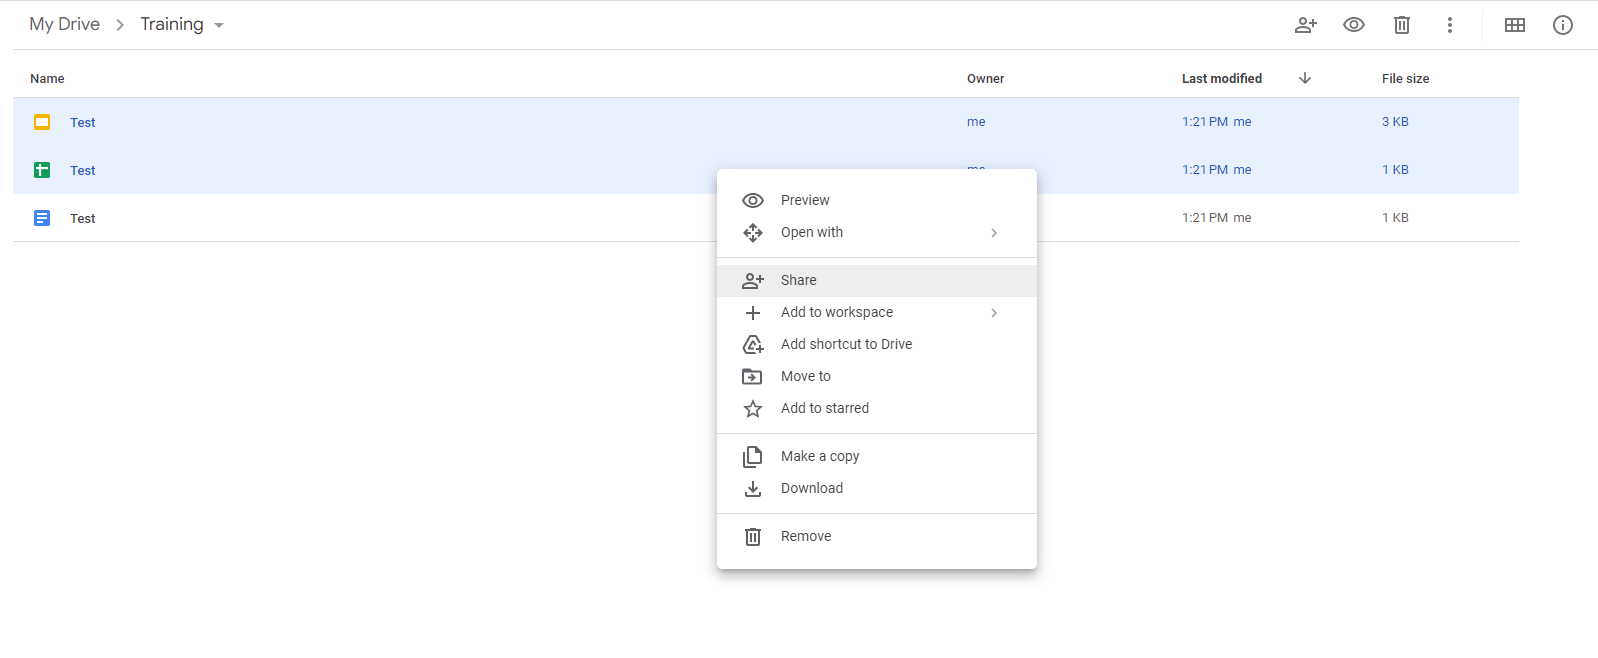
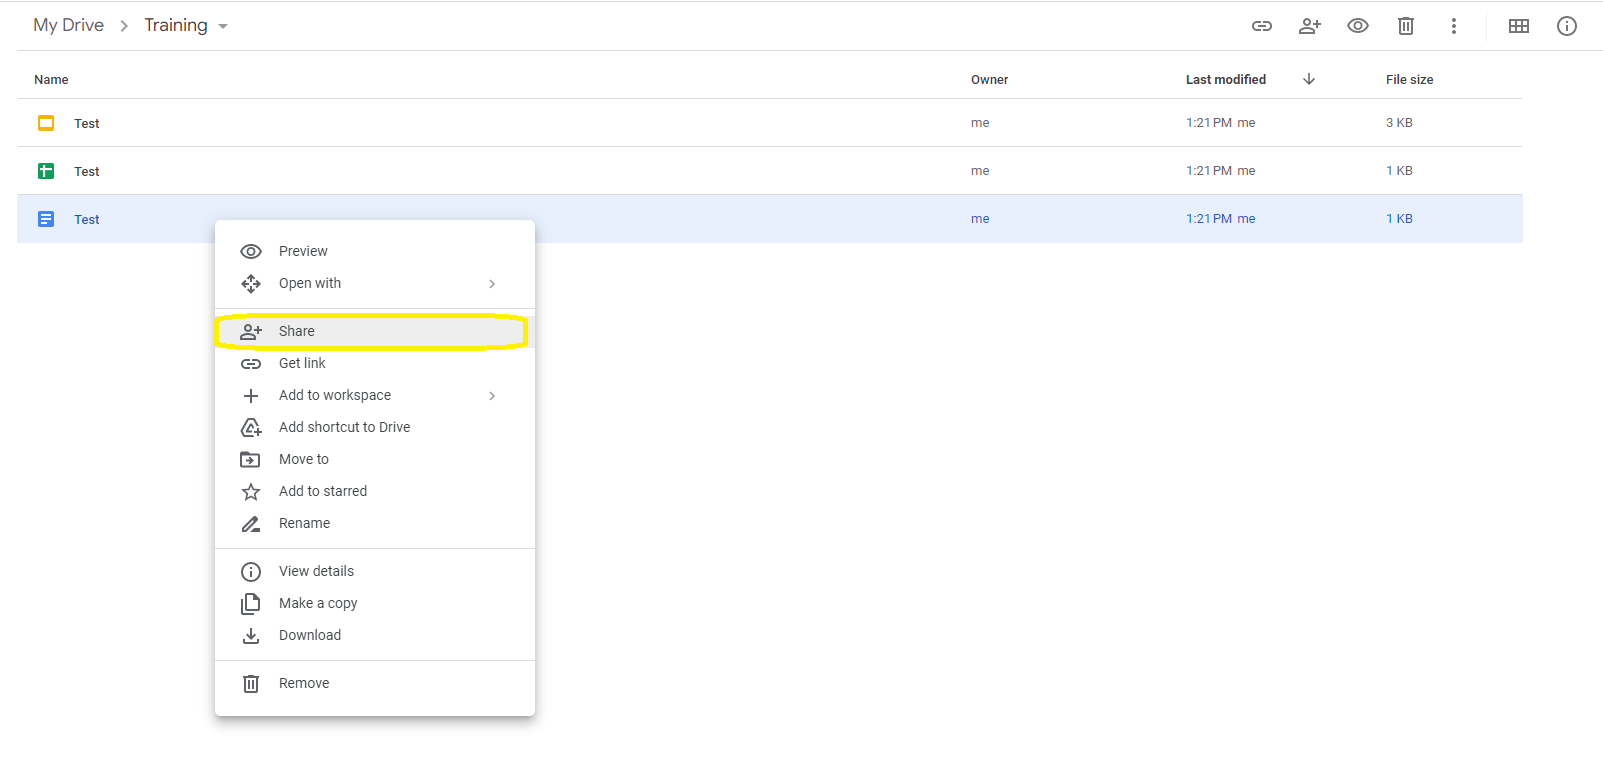
Right click on any file you selected and click "Share", or click the Share button ( ) at the top of your screen
Step 2: Choose who to share them with
At this point, you should see a screen similar to the one below
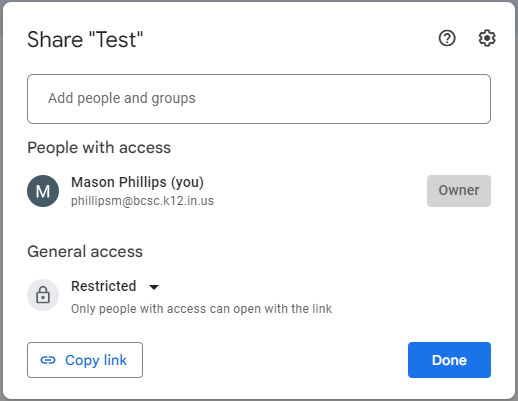
In "Add people and groups" you can search by first name, last name, or email address to grant individuals access. You can add as many users as are needed here. To add a user that is not in the district, or doesn't show up by search, type their full email address. Once you have selected a user, or entered their email address, hit enter on your keyboard.
Step 3: Choose how they can access your file(s)
After selecting a user to share with, you can decide whether or not the user is able to edit your file.
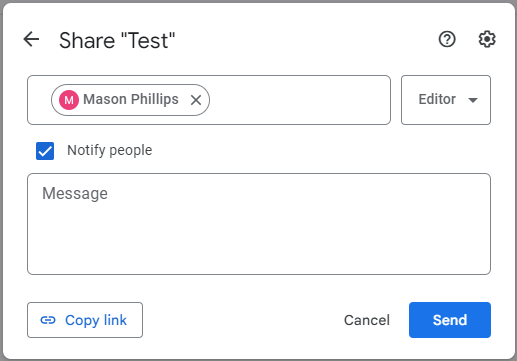
Left-clicking the drop down next to "Editor" will bring up the sharing options.
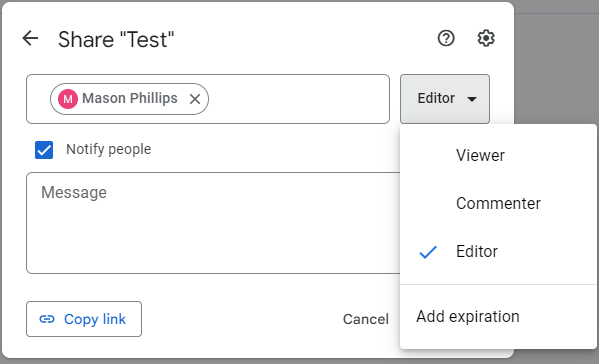
Viewers are only able to open and view the content you or other editors have added. Commenters can leave comments on the file that don't change the actual content. Editors have complete control over the content and have the same access you do.
You can also choose whether or not to notify the user, and the message you want to send with that notification if you choose. If you don't want a notification sent at all, just uncheck the "Notify people" box. The files will appear in the shared user's Drive either way.
Once you have chosen how much access is given, click Send! The file has now been shared and the user has access based on the rights you chose above.
General access
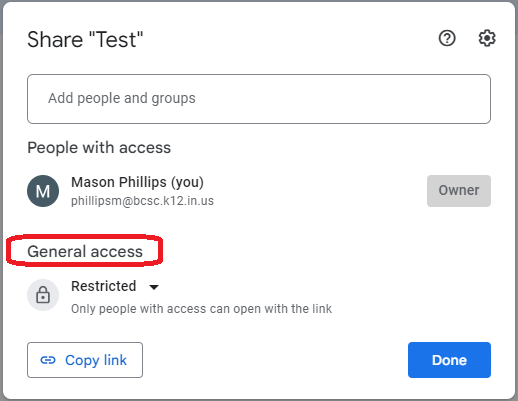
In the majority of cases, this should be left to Restricted. Restricted means only users you added in "Add people and groups" can view the file.
