Connecting to BCSC_BYOD with Windows 10

Written by Chris Bradley
Updated at August 4th, 2025
Audience: Faculty, Staff, Students
System Preference: Windows 10
- Locate the network icon near the clock in the system tray. It will either be a globe icon, wireless icon or network icon.


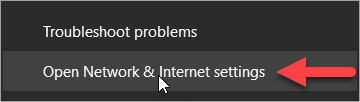
- Right-click on the network icon and pick "Open Network & Internet Settings"
- On the new screen that opens, click on "Wi-Fi" on the left.

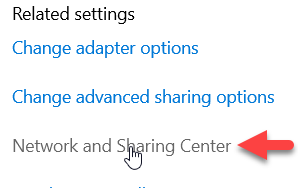
- Now, look on the right side of the screen, under "Related settings" and click on "Network and Sharing Center".
- Near the center of the screen, click on "Set up a new connection or network".

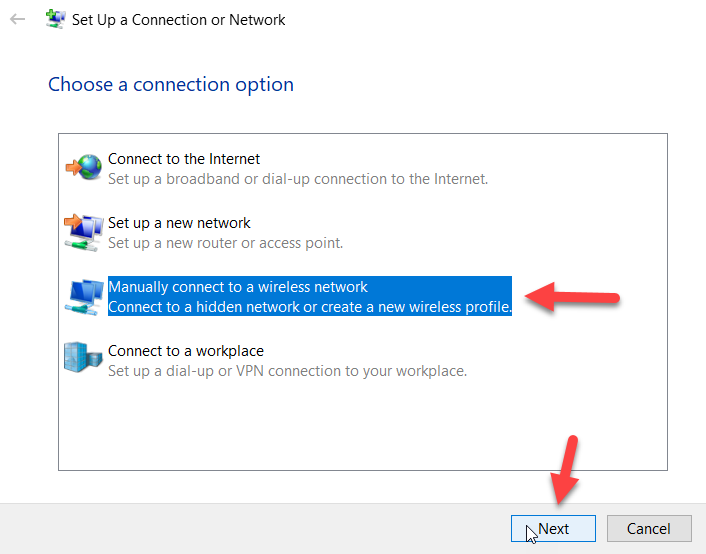
- Click "Manually connect to a wireless network" and then click Next.
- On the Manually connect to a wireless network screen, do the following:
- For "Network Name:" type in BCSC_BYOD
- Set the "Security type:" to "WPA2-Enterprise"
- Make sure the two boxes for "Start this connection automatically" and "Connect even if the network is not broadcasting" are checked.
- Then, click Next.

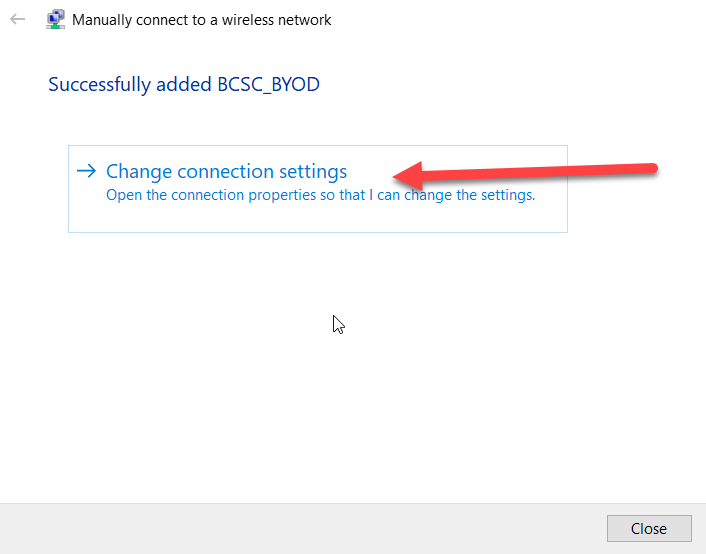
- On the screen that says "Successfully added BCSC_BYOD, click on the box in the center of the screen that says "Change connection settings".
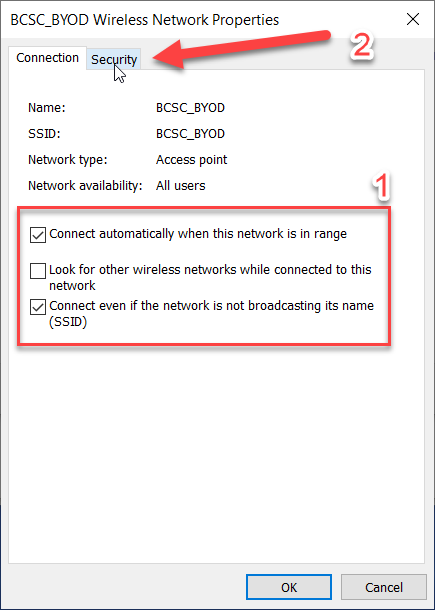
- In the "BCSC_BYOD Wireless Network Properties" window, do the following:
- Make sure the only top box and bottom box are checked (middle box should not be checked)
- Then, click on the security tab at the top.
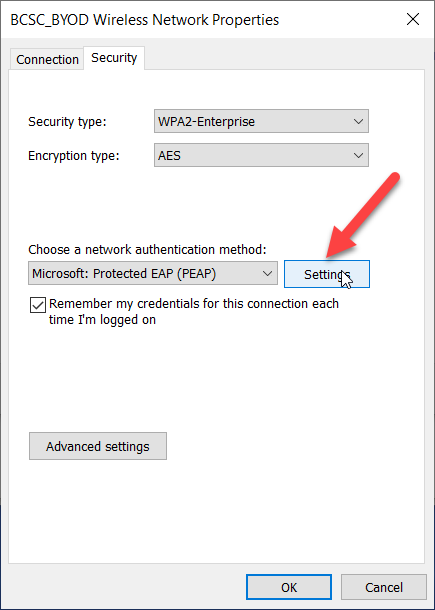
- On the security tab, click on the "Settings" button near the middle of the window.
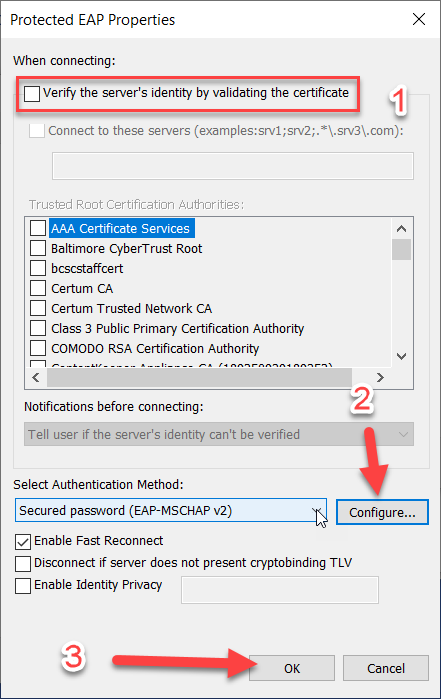
- On the "Protected EAP Properties" window, perform the following tasks:
- Uncheck "Verify the server's identity by validating the certificate"
- Click on the "Configure" button near the bottom of the window.
- Make sure that "Automatically use my Windows logon name and password (and domain if any)." is unchecked. Then, click OK.
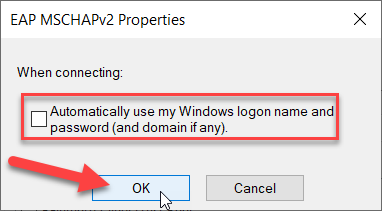
- Make sure that "Automatically use my Windows logon name and password (and domain if any)." is unchecked. Then, click OK.
- Click OK at the bottom of the "Protected EAP Properties" window
- Back on the "BCSC_BYOD Wireless Network Properties" window, click on the button near the bottom for "Advanced Settings".
- In the "Advanced settings" window do the following:
- Check the box for "Specify authentication mode:"
- Set the option to "User authentication"
- Click "Save Credentials"
- In the Windows Security box, type in your BCSC/Novell username and password and then click OK.
- In the Windows Security box, type in your BCSC/Novell username and password and then click OK.
- When you get back to the "Advanced settings" window, click OK.
- Now you should be back to the "BCSC_BYOD Wireless Network Properties" window as seen in steps 9 and 10. Click "OK" to close that window.
- Now you should be back to the "Manually connect to a wireless network" window as seen in step 8. Click "CLOSE" to close that window.
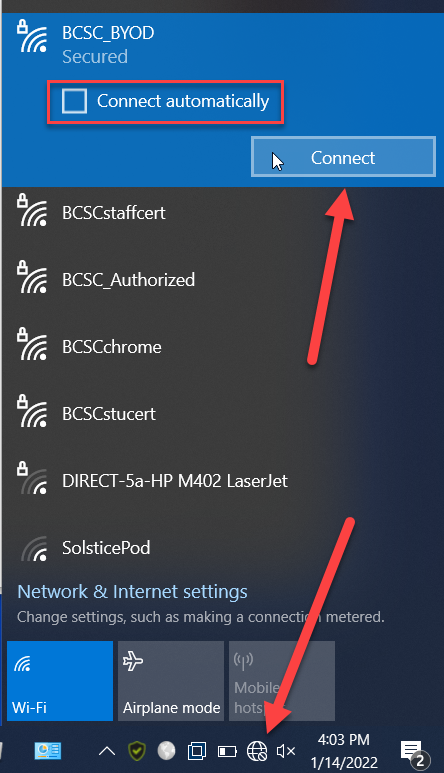
- Sometimes BCSC_BYOD will connect automatically after 30 seconds or so. If it does not, you can click on the network icon near the clock (see icons from step 1), click on BCSC_BYOD, make sure "Connect automatically" is check and click "Connect". You should be connected momentarily.
TROUBLESHOOTING
If following the above steps fails, please remove the BCSC_BYOD network and try again.
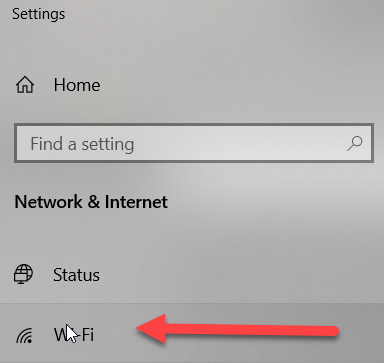
- Locate the network icon near the clock in the system tray. It will either be a globe icon, wireless icon or network icon.


- Right-click on the network icon and pick "Open Network & Internet Settings"

- On the new screen that opens, click on "Wi-Fi" on the left.
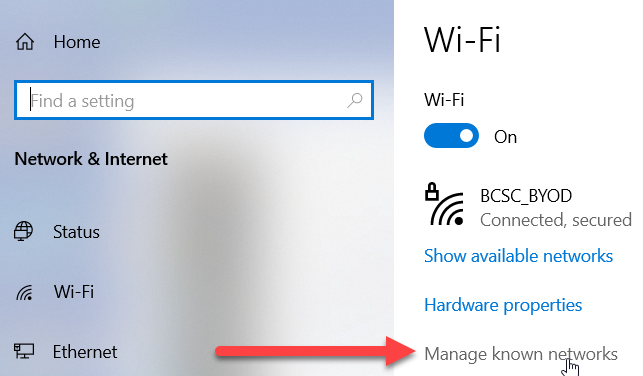
- Then click on "Manage known networks"
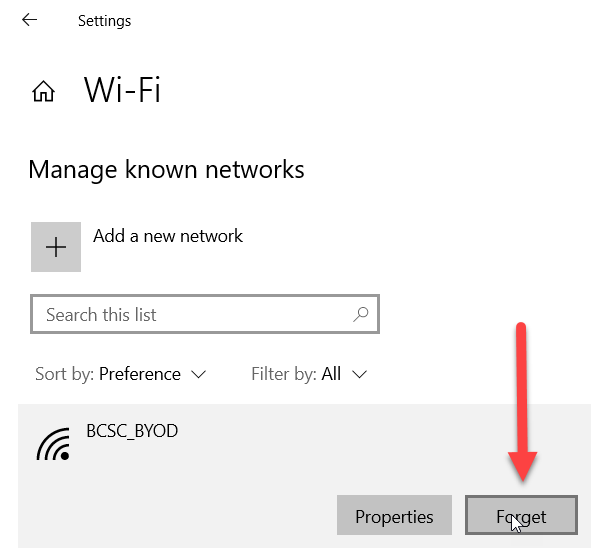
- Click on "BCSC_BYOD" and then click the "Forget" button. The BCSC_BYOD network will vanish. Close the Settings window.
- Try setting up the BCSC_BYOD network again by carefully following the steps at the top of this article. If you need help, please see a member of your buildings technology team.