PowerSchool - add a parent to a student
How to add a parent contact to a student
Audience: All Staff
System Preference: N/A
This will walk you through how to set up a new contact (parent or otherwise) for a student in PowerSchool.
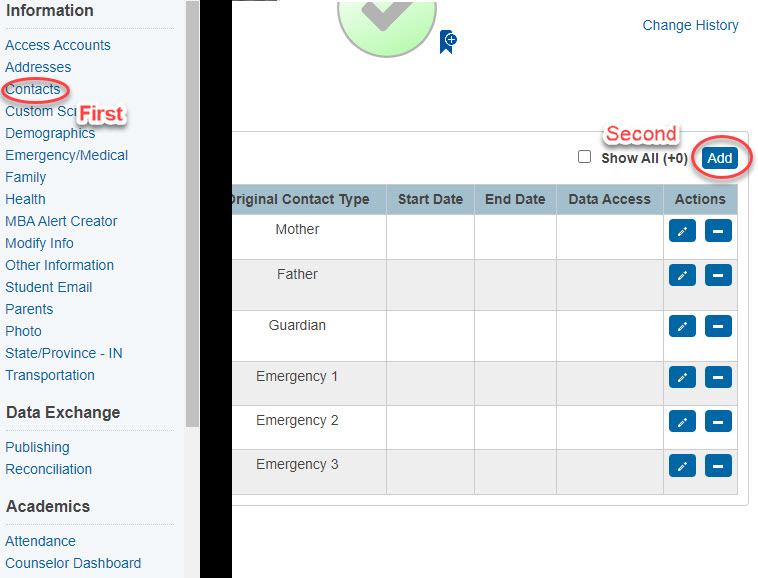
1) Under the student you would like to add the contact, click on the "Contacts" link on the left hand side and then click on the "Add" button on the right hand side of the screen.

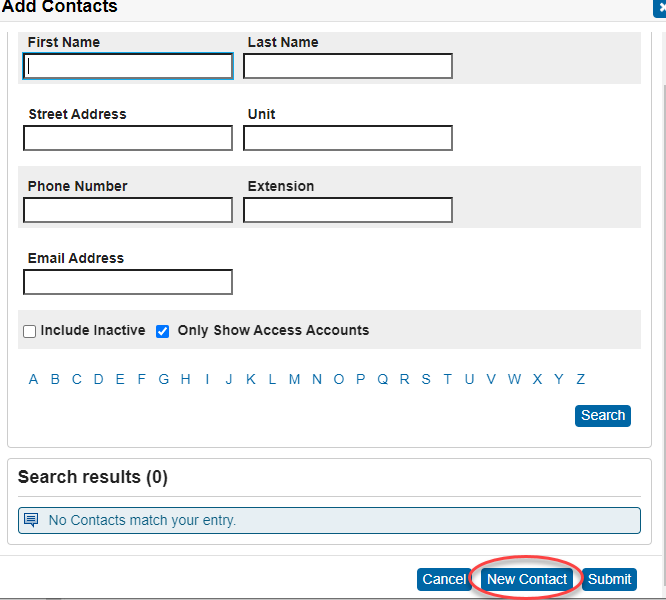
2) On the next screen that slides out, click on the "New Contact" button.

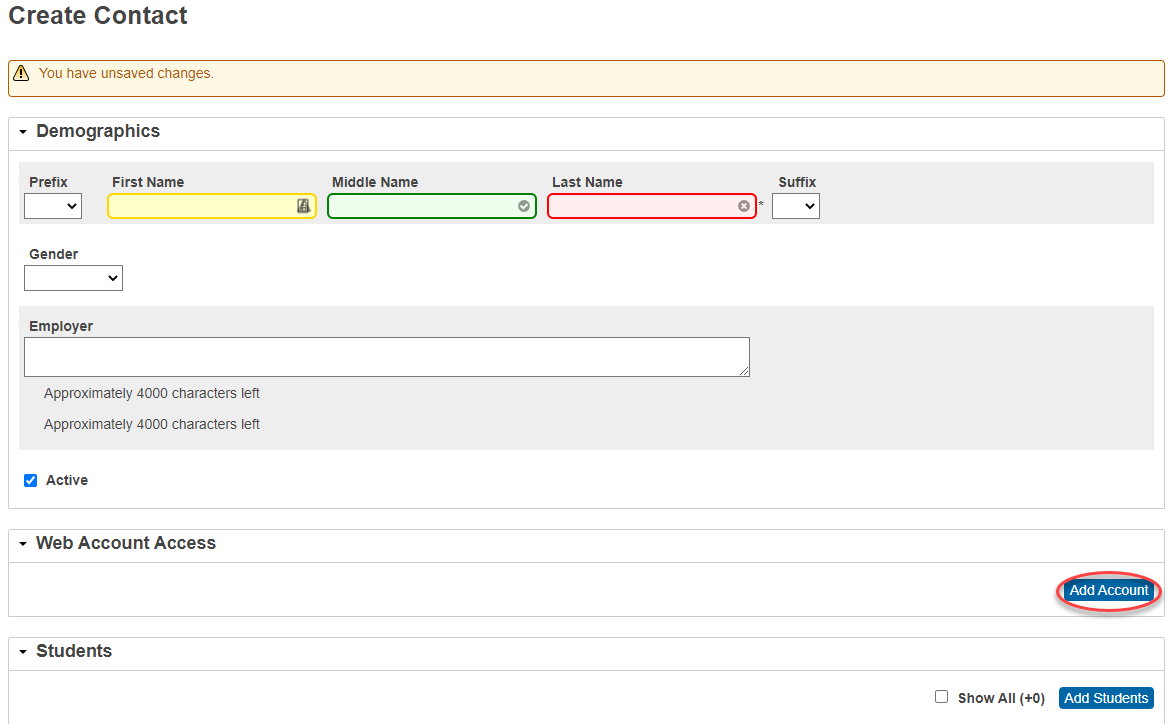
3) The information for the contact can now be filled in. The minimum that is need is a first and last name. If you would like to add an account for parent portal, click on the "Add Account" button and enter in a Username, Password (2 times) and an Email. Be sure that the Account Enabled check box is checked and then click "OK". Once you have added in all of your information, scroll to the bottom of the contact page and click "Submit".

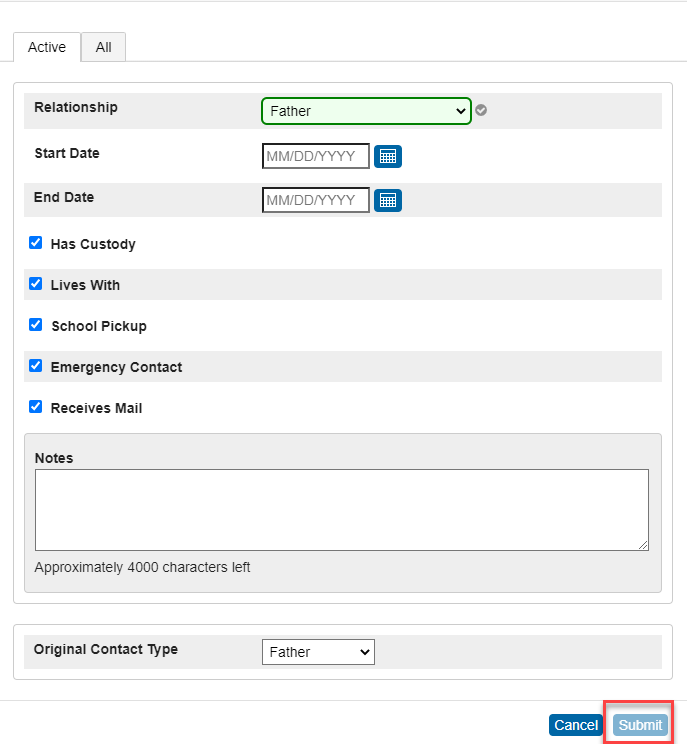
4) Back on the student contact page, click on the pencil/edit icon on the row of the newly created contact. Here you will be able to add the relation to the student this contact has, start and end date of relationship, and check boxes for "Has Custody", "Lives With", etc. You do not need to worry about the original contact type at the bottom of the page. When everything is filled in, click "Submit". That is all you need to do to create and add a contact for a student in PowerSchool.

If you need further assistance, click the following link to submit a IIQ Ticket.