US English (US)
FR French
JP Japanese
BR Portuguese (Brazil)
CN Chinese
MX Spanish (Mexico)

Contact Us

If you still have questions or prefer to get help directly from an agent, please submit a request.
We’ll get back to you as soon as possible.

Please fill out the contact form below and we will reply as soon as possible.

  • Log in
English (US)
US English (US)
FR French
JP Japanese
BR Portuguese (Brazil)
CN Chinese
MX Spanish (Mexico)
  • Home
  • Software
  • Skyward
  • TrueTime

TrueTime Kiosks - How to Install

How to install a TrueTime Kiosk

Written by Jon Pence

Updated at October 24th, 2024

Contact Us

If you still have questions or prefer to get help directly from an agent, please submit a request.
We’ll get back to you as soon as possible.

Please fill out the contact form below and we will reply as soon as possible.

  • Accounts/Permissions
  • Connectivity
    Wireless Networks BYOD (Bring Your Own Device)
  • eLearning
  • Email
  • Google
    Summer EdTech PD
  • Hardware
    Staff Tech Student Tech Other Chromebooks DocCam iPads Printers Visual Display
  • Resources
    Teacher Classified Staff Administrator Student
  • Support Ticket
  • Software
    Web Browser Productivity Accessibility Video Conferencing Assessment ParentSquare LLLOW PowerSchool Skyward Frontline Aesop Destiny
  • Teacher Resources
  • Human Resources
  • BCSC Transportation
    EZ Routing Routing and Planning
  • Phones
  • Food Service
  • Administrative Assistants Meeting
  • Canvas Learning Management System
  • Safety and Security
+ More

Audience: IT

Operating System: N/A

This will walk you through how to install one of the new TrueTime Kiosks.  The brackets for these are already mounted near high traffic areas in the buildings.  If you need help locating where a bracket is, please discuss with your buildings front office.

This kiosks, will have a 4+ hour battery back-up built in incase they are unplugged or if there is a power outage at one of the buildings.  They have the ability to use a proxy card (Employee ID card) to clock-in and out.  Initially, you will need to use a pin that contains your last two digits of your birth year and the last four digits of our Social Security number.  (Ex. 1922 and 333-44-5566 would be a pin of 225566).  Employees that already use TrueTime will be able to start using these once they know their pin numbers.  We will be rolling out the proxy card ability after we have everyone using TrueTime with their pin numbers.

Your browser does not support HTML5 video.

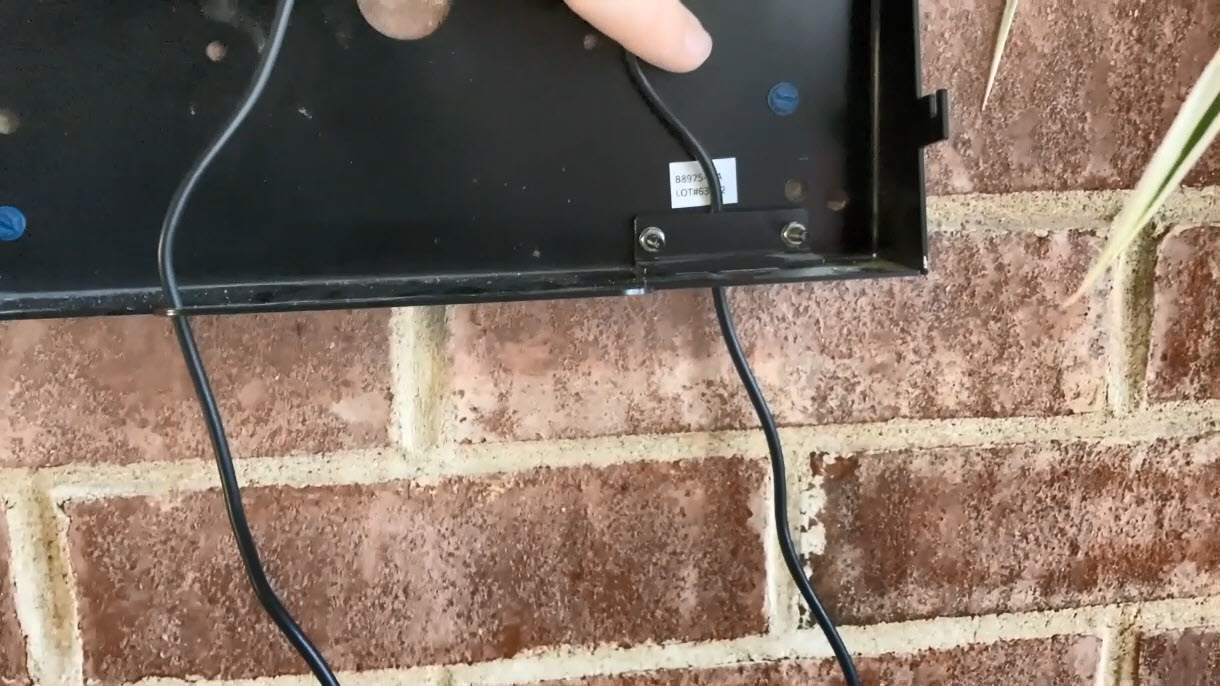
1) Run the power cable through the lower right hand opening in the bracket.  You will need a 1/4" nut driver or wrench to tighten both sides of the metal piece.  This should be pretty tight and not allow the power cable to be pulled from the bottom.  Do not leave excess slack from the bracket to the electrical outlet.


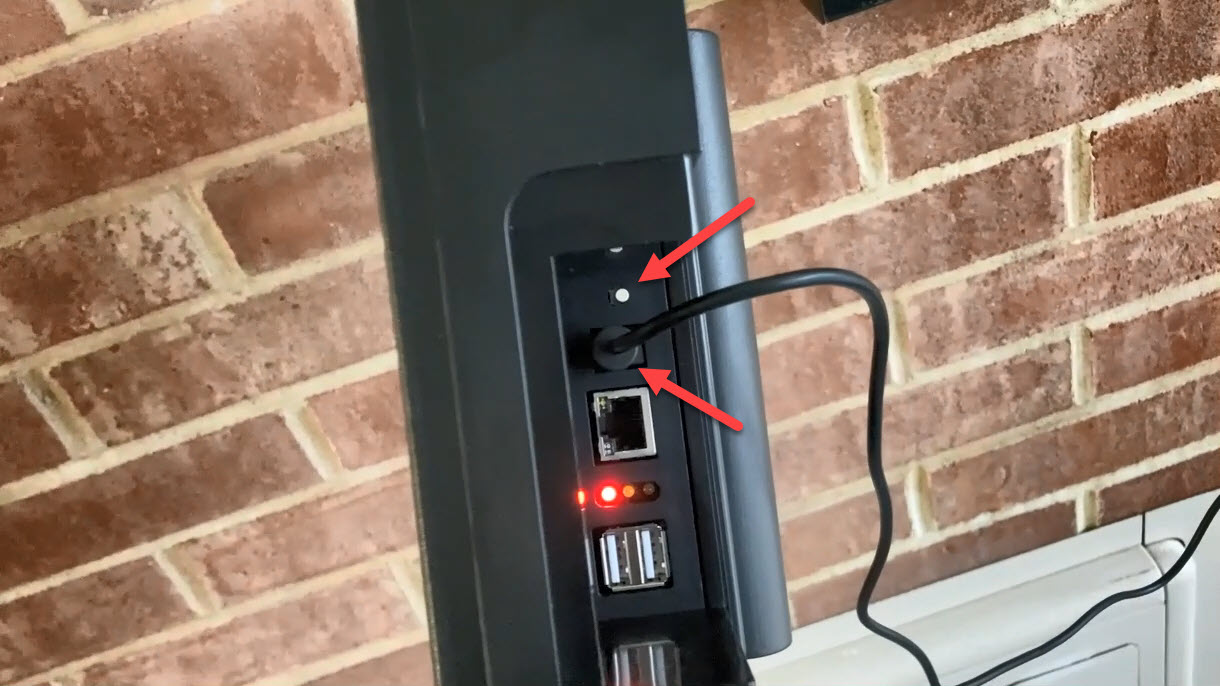
2) Once you have tightened the holder on the A/C cable.  Plug the cable into the Kiosk.  If the kiosk does not turn on after you plug in the cable, press the small light-gray button next to the power port on the device.


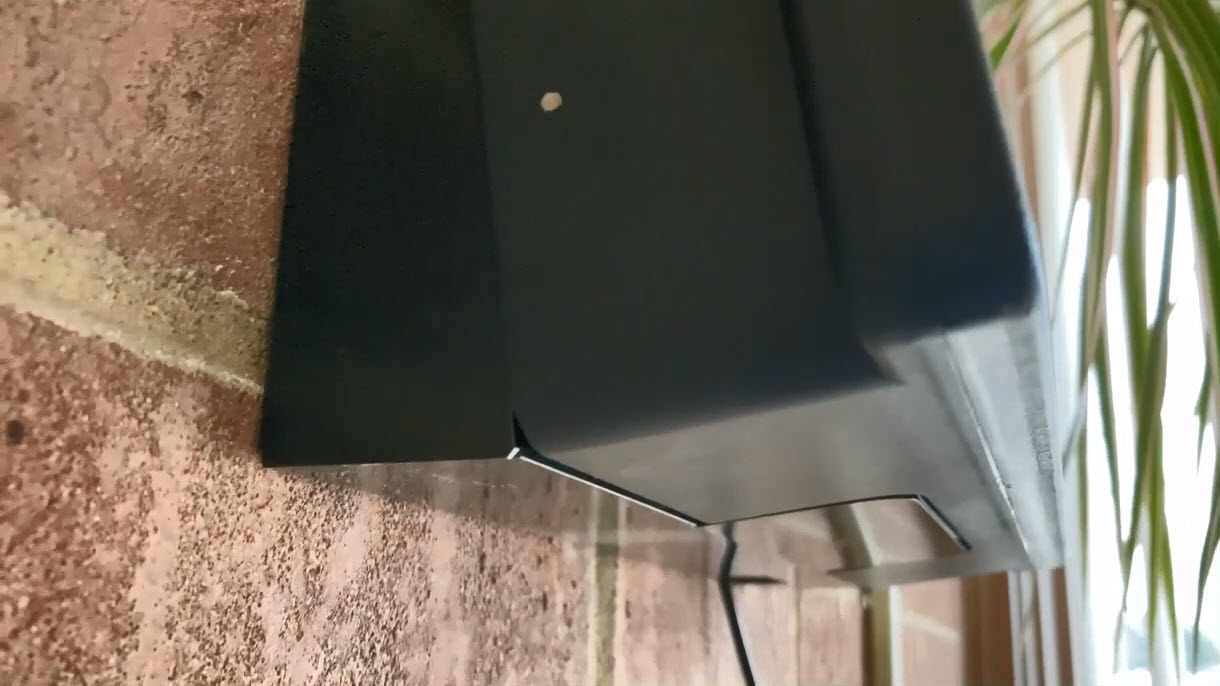
3)  Once the device start to power up, you can look at placing the device on the cradle.  Line up the kiosk bottom cut-out (Picture 1) with the metal sticking out of the bracket (Picture 2).  Line up the two with the kiosk sitting on the the bracket.  You should gather the extra cable coming from the back of  the kiosk and loop it around 3-5 time and place it behind the kiosk.   Once the cable is together, slide the kiosk up to the hooks on the left and right of the bracket.  Then gently push forward and slightly up to get the kiosk to set on the top of those hooks.  Press down and check that the kiosk is flush with the metal on the bracket (Picture 3).


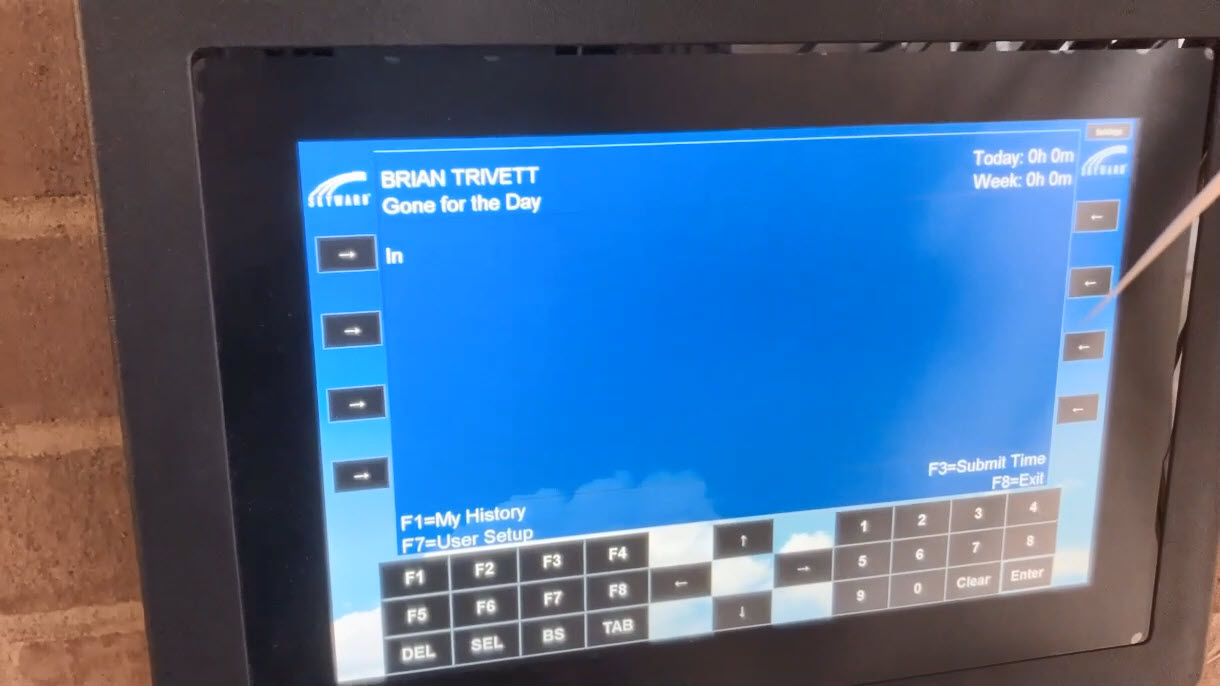
4) Once you have verified that the kiosk is in place, use the key to lock the kiosk into place.  Now, test with your pin to see if you can log in.  Sometimes, it may take up to 5 minutes before it is connected back to the wireless network.  Press "F1" on the kiosk and enter your pin and press "Enter".  You should see a a new screen with your name, clock-in/out status, and a clock-in or clock-out option.  If you see this, everything is set and ready to go.


install truetime

Was this article helpful?

Yes
No
Give feedback about this article

Related Articles

  • Skyward Employee Access - Adding Widgets
  • Skyward Employee Access - Approve or Deny Time Off
  • Skyward Employee Access - Approve or Deny Time Sheets
  • Skyward Employee Access - Clocking In and Out
  • Skyward Employee Access - Removing Time Off Requests

Visit Us

BCSC CRISIS HOTLINE: (812) 379-7710

1200 Central Avenue

Columbus, IN 47201

Get Directions

Contact Us

Phone: (812) 376-4234

Fax: (812) 376-4486

Email Us

  • Site Map
  • Apply For A Job
  • Accessibility Statement
  • IDOE- INview
  • Configurable Footer Link
  • Configurable Footer Link
Bartholomew Consolidated School Corporation does not condone or tolerate systemic racism of any kind. BCSC values inclusion and diversity. As a community we must stand together to end racism. We believe in a school community where everyone feels safe and valued.
Blackboard, Inc. All rights reserved.
  • Questions or Feedback?
  • Terms of Use
  • Blackboard Web Community Manager Privacy Policy (Updated)
Copyright © 2002-2021 Blackboard, Inc. All rights reserved.

Definition by Author

0
0
Expand