Print ID barcodes compatible with Incident IQ
Create student and staff ID barcodes in PowerSchool and Word
Print Barcodes in Bulk in PowerSchool
This method should be used to print student labels in bulk. The barcodes will always begin with the 1st label.
The video guide can be viewed here.
- Select the students for whom you need to print the barcodes.
- If printing for the entire grade, select the necessary grade level, click the pointed down arrow at the bottom right of the Student Selection Screen, and click Print Mailing Labels. After you use this report once, you'll see a shortcut next to the pointed down arrow.
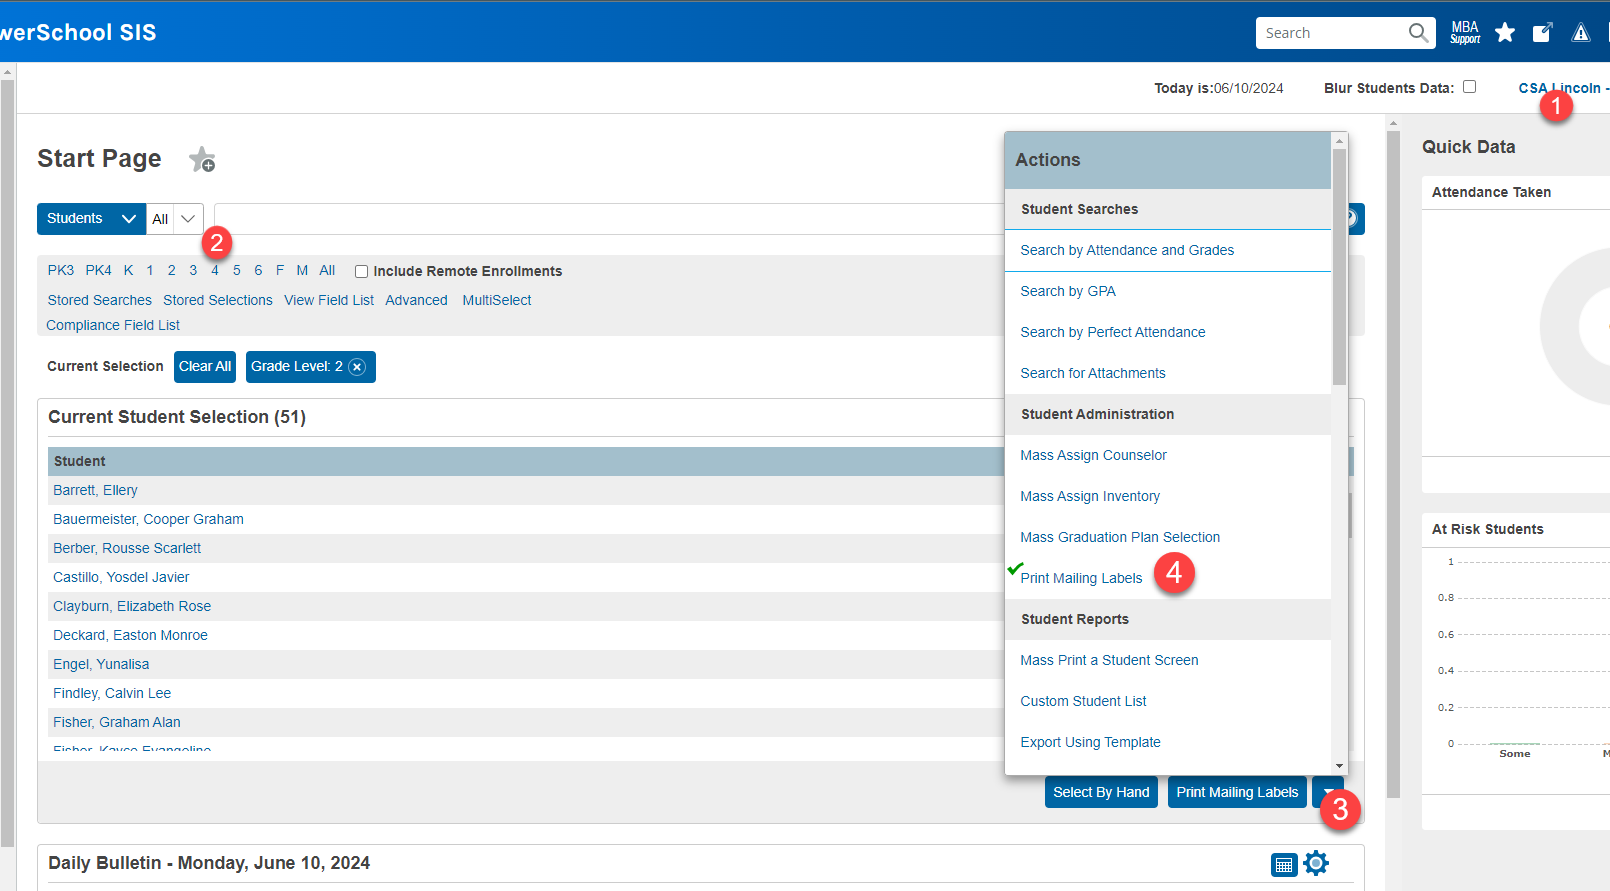
- If printing by class
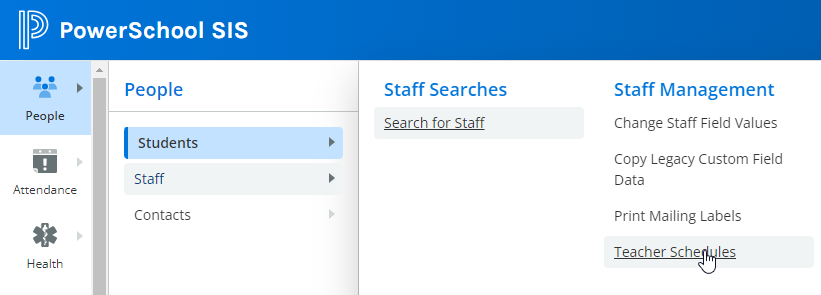
- go to People - Staff - Teacher Schedules
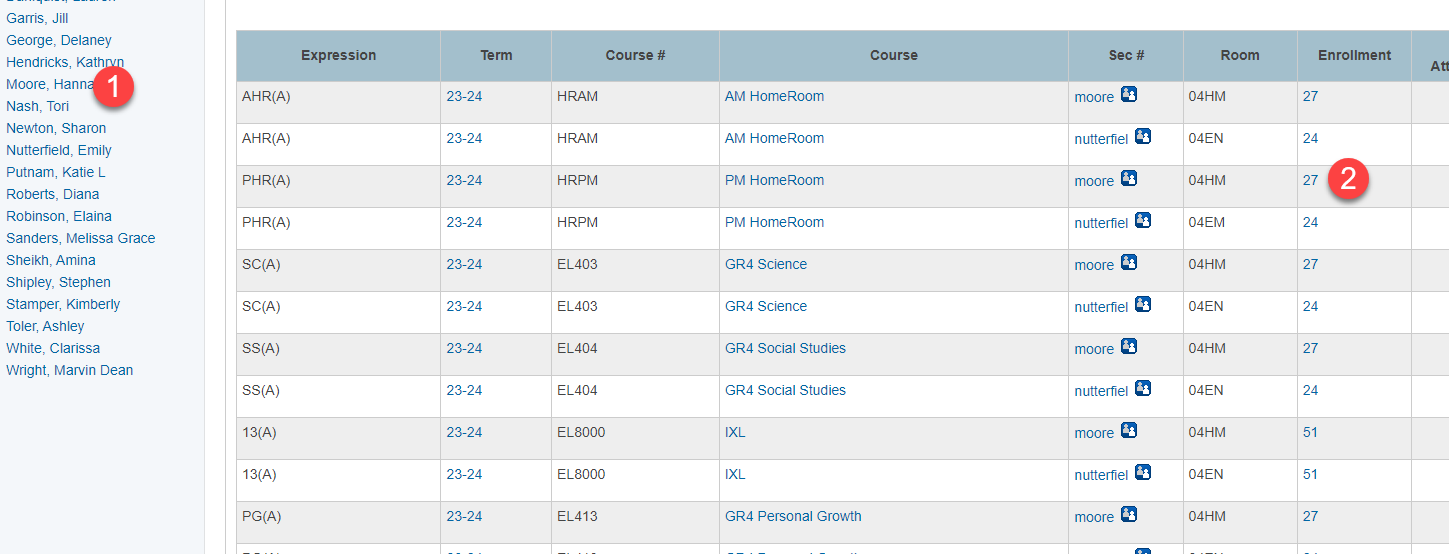
- Click on the name of the teacher, then on the number in the Enrollment column
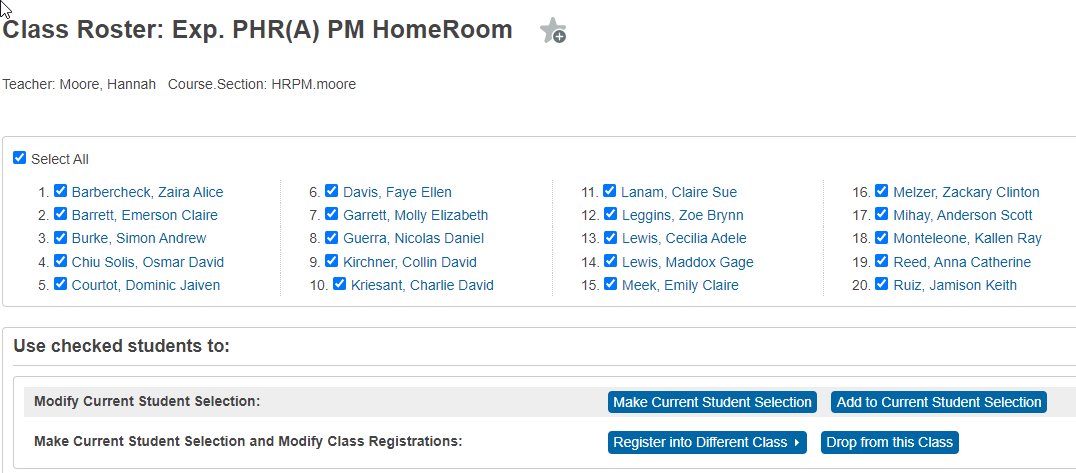
- Click Make Current Student Selection
- Click the pointed-down arrow at the bottom right of the Student Selection Screen, and click Print Mailing Labels. After you use this report once, you'll see a shortcut next to the pointed-down arrow (see point a for image)
- go to People - Staff - Teacher Schedules
- If printing for the entire grade, select the necessary grade level, click the pointed down arrow at the bottom right of the Student Selection Screen, and click Print Mailing Labels. After you use this report once, you'll see a shortcut next to the pointed down arrow.
- In the Print Mailing Labels window make appropriate selections. The mailing label layout should be “Building Tech Barcode”. The other selections will usually stay default. Click Submit
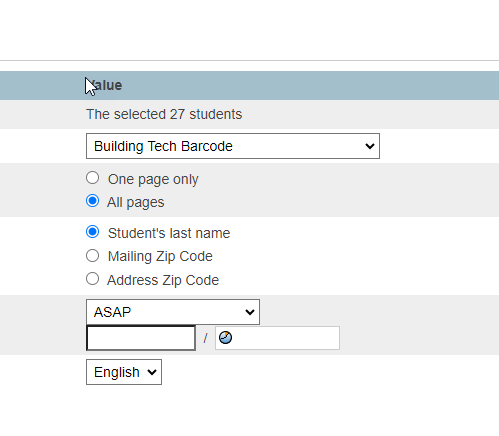
- In the Report Queue click View click View next to the latest report (open in new windows - it will close in the current window by default) and you will see the list of labels for the selected students. Print as necessary.
Please note that there is no function to select the first label from which to print. All labels will be printed starting with label #1 on the sheet.
Print Individual Barcodes in Word
Individual barcodes may be printed using MS Word. To be able to do that, please complete the installation of the barcode font Libre Barcode 39.
The video guide can be viewed here.
Go to this link and click Get Font - Download. The zip file can also be downloaded here (Tech shared drive - Downloadables - Barcode Printing - Libre_Barcode_39.zip)
Extract the downloaded file and click on LibreBarcode39-regular TrueType font file.
At the top left, click Install and follow the prompts.

After the font is installed, you'll be able to find it in MS Word
Download this template. Open it in MS Word, copy the first template to the desired label space. Replace the student name with the desired name and type the barcode instead of the template in the format *ID* (if the ID is 123456, type *123456*)
Printing Staff Barcodes in Destiny
The video guide can be viewed here
Staff barcodes can be printed on Destiny. Go to the Patron Status. Make sure that the staff barcode is set to their Google Username.
If the barcode matches the Google Username, click Print Label

Enter the number of the starting label and run the report.
If the barcode does not match the Google Username, click Edit Patron, navigate to Barcode, edit it to match the Google Username and click save.
